 |
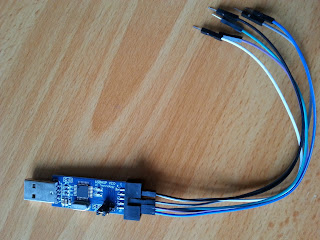
| Usbasp programmer |
Until recently, whenever I wanted to program an ATtiny85 chip, I used Arduino as ISP option about which I wrote in an earlier blog post. However, that is not a very convenient way of programming these tiny chips. Because of that, today I'm writing down the steps I followed to try programming ATtiny85 chips using a Usbasp programmer board. We can easily buy them for a very cheap price and no need of a huge effort to set it up for the programming job. In this post I will be doing everything on an Ubuntu 12.04 machine and will use Arduino IDE for the coding. I'm using a USBASP V2.0 board. I will list down the steps I used one by one. So, here we go.
(1) Connect the Usbasp programmer with ATtiny85 chip as shown in the picture. I will be using a breadboard and few jumper wires for this connection.
 |
| Pin connections between Usbasp and ATtiny85 |
(2) Create a something.rules file in /etc/udev/rules.d. Add the following line into it.
SUBSYSTEMS=="usb", ATTRS{idVendor}=="16c0", ATTRS{idProduct}=="05dc", GROUP="users", MODE="0666"
(3) Now issue the command,
sudo service udev restart
(4) Now Arduino IDE can detect the USBASP programmer when it is connected to the USB port. From the tools menu, select the programmer Usbasp. From tools menu, select the board, "ATtiny85(internal 1MHz clock)".
(5) Program code for the blink program.
1 2 3 4 5 6 7 8 9 10 11 12 13 14 15 16 17 18 19 | /* Blink Turns on an LED on for one second, then off for one second, repeatedly. This example code is in the public domain. */ void setup() { // initialize the digital pin as an output. // Pin 0 has an LED connected on most Arduino boards: pinMode(0, OUTPUT); } void loop() { digitalWrite(0, HIGH); // set the LED on delay(1000); // wait for a second digitalWrite(0, LOW); // set the LED off delay(1000); // wait for a } |
There will be a warning saying that, 'avrdude: warning: cannot set sck period. please check for usbasp firmware update'. We can simply ignore it.
(6) Now we can connect a LED in between ground and physical pin number 5
of the ATtiny85 chip will cause the LED to blick. In our program code in Arduino IDE, we mentioned the pin as 0 which actually represent the PB0 pin in the ATtiny85 chip. The PB0 pin is actually the physical pin 5.

No comments:
Post a Comment